
Prepping Wall for Paint Made Easy: A Foolproof Process for Flawless Results
Proper wall preparation is the foundation of a flawless, lasting paint job. Skipping even one step often leads to uneven finishes, peeling, or a dull, patchy appearance over time. In fact, studies show that 80% of people attempting DIY projects make mistakes, and 45% admit to completely ruining a project. Fortunately, with the right approach, prepping a wall becomes a simple, manageable process that sets every painting project on the right track.
Here are the essential steps to clean and prime walls before painting.
Table of Contents
Key Takeaways✔ Gather all essential tools and materials ahead of time to ensure a smooth and uninterrupted wall preparation process. ✔ Protect floors, furniture, and fixtures by moving items away and covering surfaces with drop cloths and plastic sheets. ✔ Wipe down walls thoroughly to remove dust, dirt, and grease for better paint adhesion and a cleaner finish. ✔ Fill all holes, cracks, and dents with spackle or filler to create a smooth and even painting surface. ✔ Lightly sand repaired areas and rough spots to blend surfaces and remove imperfections before painting. ✔ Apply painter’s tape carefully around edges, trim, and fixtures to achieve clean, crisp paint lines. ✔ Use primer on repaired areas, stained surfaces, or dark walls to create an even base for the topcoat. |

Step-by-Step Guide to Prepping Walls for Painting
Step 1: Gather Necessary Materials
Preparation is the foundation of a perfect paint job. Before beginning, it is important to gather all essential tools and supplies. Having everything within reach saves time, reduces stress, and ensures a smooth workflow.
Essential Tools and Supplies for Wall Preparation
A well-organized setup with the right tools ensures the best results. This part of the wall preparation guide for painting focuses on assembling high-quality materials before any actual work starts.
- Drop Cloths: Drop cloths protect floors and furniture from paint splatters and dust, helping maintain a clean workspace.
- Spackle or Wall Filler: Spackle is used to fill small holes, cracks, and dents in the wall, creating a smooth surface for painting.
- Putty Knife: A putty knife spreads spackle or filler evenly across imperfections, making it easier to repair the wall neatly.
- Sandpaper or Sanding Block: Sandpaper smooths out rough patches, old paint edges, and repaired areas, ensuring the wall surface is even.
- Painter’s Tape: Painter’s tape is used to cover edges, trims, and fixtures to achieve clean, sharp paint lines without bleeding.
- Cleaning Supplies (Mild Soap, Sponge, Bucket): A sponge and mild soap are essential for removing dirt, dust, and grease from the wall surface.
- Primer (If Needed): Primer prepares the surface for paint, especially important when working with repaired areas, stains, or drastic color changes.
- Safety Gear (Gloves, Mask, Goggles): Proper safety gear protects hands, lungs, and eyes from dust, chemicals, and debris during wall preparation.
Step 2: Clear and Protect the Area
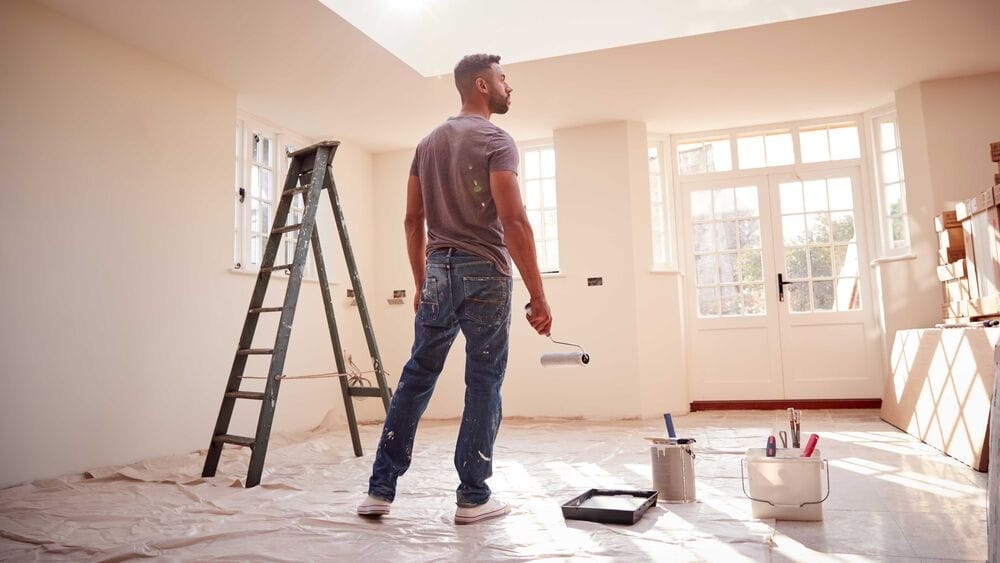
Preparing the space before painting ensures a clean, efficient, and professional result. A key part of prepping the wall for paint is making sure all surfaces and belongings are fully protected. Following a detailed wall preparation guide for painting not only saves time but also prevents unnecessary damage.
Remove or Relocate Furniture
Before starting the wall preparation, it is crucial to clear as much of the room as possible.
- Move Furniture Out of the Room: Large pieces like sofas, tables, and chairs should be moved to another room whenever possible. This creates a spacious, hazard-free workspace.
- Shift Remaining Furniture to Center: If items cannot be removed, they should be pushed to the center of the room to provide better access to the walls.
Cover Floors and Remaining Furniture
Keeping floors and furniture protected is a basic step in professional wall prepping techniques.
- Lay Down Drop Cloths: Heavy-duty canvas or plastic drop cloths should be spread over the floor to catch dust, debris, and paint splatters. Canvas is preferred for its durability and non-slip surface.
- Use Plastic Sheets for Furniture: Lightweight plastic sheets are ideal for covering furniture. They shield from dust and accidental paint drips without adding extra weight.
- Secure Covers with Tape: Using painter’s tape, secure the edges of drop cloths and plastic covers to prevent them from shifting during the work.
Prepare Wall Fixtures and Trim
Fixtures and trims often get overlooked but are just as important in the steps to clean and prime walls before painting.
- Remove Wall Décor and Fixtures: All pictures, mirrors, and wall-mounted hardware should be carefully removed to allow full access to the wall surface.
- Protect Trim and Outlets: Light switches, outlet covers, and baseboards should be shielded using painter’s tape to avoid unwanted paint marks and ensure a neat finish.
Step 3: Clean the Walls
Cleaning the walls is one of the most important steps in the wall preparation guide for painting. A clean surface ensures that paint adheres properly, creating a smooth and professional finish. Skipping this step can lead to peeling, uneven texture, and a shorter paint lifespan.
Steps to Clean Walls for Painting
Before moving forward with sanding or priming, it is crucial to thoroughly clean the walls. Follow these steps to clean and prime walls before painting:
- Remove Loose Dust and Cobwebs: Use a microfiber cloth, duster, or vacuum with a brush attachment to gently remove dust, cobwebs, and surface dirt from all parts of the wall, including corners and baseboards.
- Wipe Walls with a Damp Cloth: After dusting, lightly wipe down the walls with a damp, soft cloth. This removes finer dust particles that could interfere with paint adhesion.
- Use a Mild Cleaner for Stubborn Spots: If there are greasy areas, fingerprints, or other stains, use a gentle wall cleaner or a diluted mix of dish soap and water. Focus especially on high-traffic areas like kitchens and hallways.
- Dry the Walls Thoroughly: After cleaning, allow the walls to dry completely. Painting over a damp surface can cause bubbling and poor adhesion.
Best Tools for Wall Preparation
Choosing the best tools when prepping wall for paint can make the cleaning process faster and more effective. Professionals in Glastonbury, CT, recommend having a few key items ready before starting:
- Microfiber Cloths: Soft and non-abrasive, they trap dust and dirt without scratching the wall surface.
- Sponge Mop or Soft Sponge: Ideal for reaching high areas and for wiping large wall sections evenly.
- Mild, Non-Abrasive Cleaner: Essential for removing stains without damaging wall finishes.
- Vacuum with Brush Attachment: Quickly removes dust from textured walls, trims, and corners.
Step 4: Repair Imperfections
A strong foundation begins with addressing every flaw on the wall. Properly fixing imperfections ensures a smooth surface and professional finish once the paint is applied.
Assess the Wall Thoroughly
Before beginning repairs, it is important to inspect the wall carefully for all visible and hidden issues. Small defects, if ignored, can ruin the final look of the painted surface.
- Minor Holes and Dents: Look for small nail holes, dings, and other minor surface flaws that need patching.
- Cracks and Deep Gouges: Check for deeper cracks or cuts that may require a heavier filler or joint compound.
- Surface Texture Issues: Identify areas where the wall texture feels uneven or rough.
Choose the Right Filler
Selecting the correct material is key to seamless wall repair. Using the best tools for wall preparation helps make this step efficient and ensures a solid finish.
- Lightweight Spackle: Ideal for small holes and minor dents. It dries quickly and is easy to sand.
- Joint Compound: Best for larger cracks and areas that need a smoother, reinforced patch.
- Patch Kits: Handy kits that often include everything needed for basic repairs on drywall or plaster.
Apply the Filler Correctly
Proper application ensures that the repair blends into the surrounding wall without creating bumps or ridges. Following professional wall prepping techniques here is essential.
- Load the Putty Knife: Use a small amount of filler on the putty knife, applying firm but even pressure.
- Smooth Over Repairs: Spread the filler slightly wider than the damaged area to feather the edges into the wall.
- Remove Excess: Scrape off any extra filler to prevent additional sanding later.
Allow Repairs to Dry Completely
Patience is critical during the drying stage. Rushing this process can cause uneven surfaces once the paint is applied.
- Follow Manufacturer’s Instructions: Drying times can vary based on the product and room conditions.
- Avoid Touching Repairs Early: Touching or sanding too soon can pull filler out of place or cause cracks.

Step 5: Sand the Surface
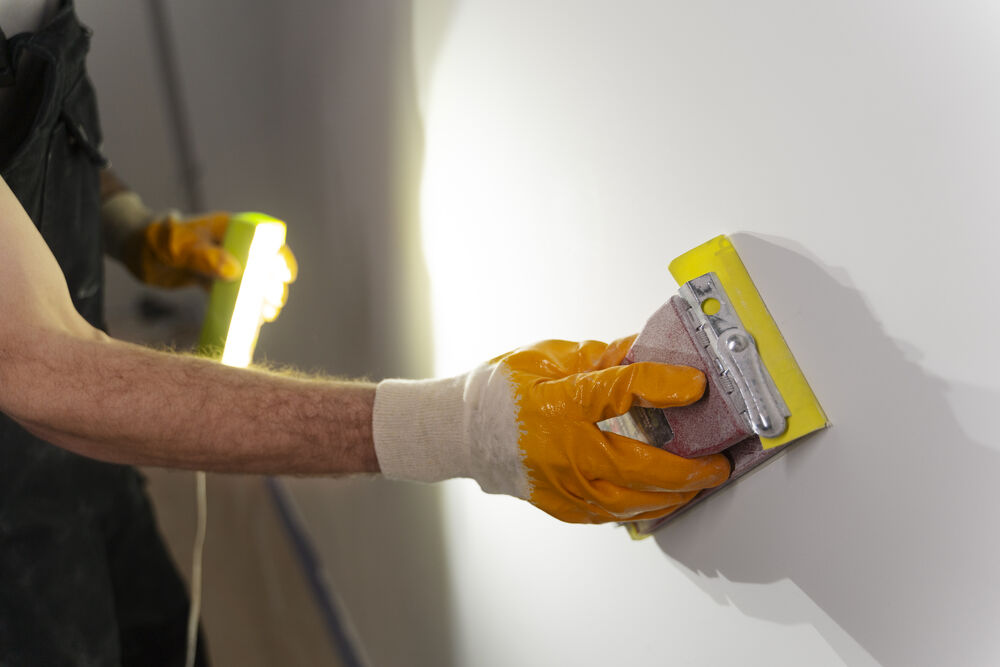
Proper sanding is one of the most important steps when prepping wall for paint. It ensures a smooth, even surface, allowing paint to adhere better and deliver a flawless finish. Skipping or rushing this step can leave imperfections that show through the final coat.
Choose the Best Tools for Sanding
Selecting the right equipment is key when following professional wall prepping techniques. Using the proper tools makes the job easier and more effective.
- Sanding Sponge: Ideal for gently smoothing patched areas and getting into corners without damaging the surface.
- Pole Sander: Perfect for larger walls and ceilings, a pole sander covers more area quickly while maintaining even pressure.
- Fine-Grit Sandpaper (120–150 Grit): Best for finishing surfaces without creating deep scratches that could show through paint.
Sand Properly
Following these easy steps ensures a clean, even wall, laying a strong foundation for the next stages in the steps to clean and prime walls before painting.
- Focus on Patched and Rough Areas: Only sand where needed to avoid overworking the wall surface.
- Use Light, Even Pressure: Apply even, gentle pressure to avoid creating gouges or uneven spots.
- Sand in Circular Motions: Moving in circles helps feather out edges and blends patches seamlessly into the wall.
Dust Off the Walls
After sanding, it is critical to remove all sanding dust to avoid trapping debris under the paint. Residual dust can cause paint imperfections like bumps or an uneven texture.
- Wipe Walls with a Damp Cloth: A simple damp cloth easily lifts and traps dust from the surface without leaving residue.
- Use a Tack Cloth for Fine Dust: Tack cloths are slightly sticky and designed to pick up fine particles left behind after sanding.
- Vacuum the Area Thoroughly: Vacuuming floors, baseboards, and even the walls ensures no dust remains before priming and painting.
Step 6: Tape and Edge Protection
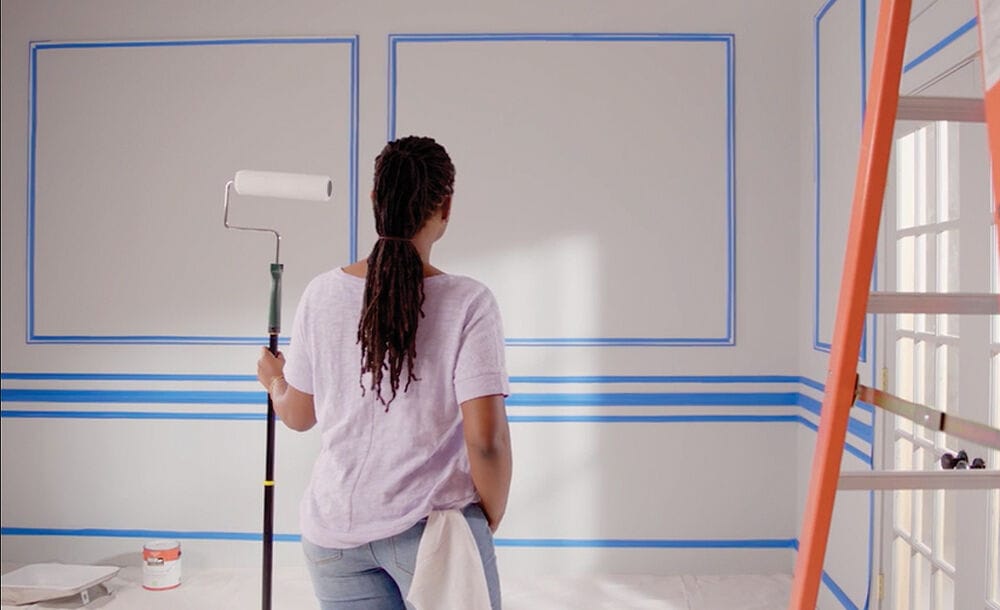
Taping and protecting edges is a critical part of prepping a wall for paint. It ensures neat, professional-looking results without messy mistakes. Taking a few extra minutes to tape properly can make a big difference in the final look.
Why Proper Taping Matters
Secure, accurate taping prevents paint from bleeding onto surfaces like trim, windows, or ceilings. It also saves time by reducing the need for touch-ups later.
- Prevents Paint Bleed: Sealing tape edges tightly stops paint from seeping underneath and creating uneven lines.
- Saves Cleanup Time: Proper taping minimizes mistakes, meaning less time spent fixing errors after painting.
- Protects Fixtures and Trim: Windows, doors, and built-in elements stay clean and untouched by paint.
Choose the Right Tape
Using the right tools is part of professional wall prepping techniques. The best tape can handle sharp lines without damaging surfaces when removed.
- Painter’s Tape: Designed specifically for painting, painter’s tape offers easy application and clean removal.
- Delicate Surface Tape: Ideal for freshly painted or sensitive surfaces to avoid peeling paint.
- Wide Tape: Useful for covering broader areas and ensuring greater protection in one strip.
Apply Painter’s Tape Correctly
Following the correct method ensures the tape performs as intended and helps achieve a flawless finish.
- Clean the Surface First: Dust and grime can prevent tape from sticking. Wipe the surface with a clean cloth as part of the steps to clean and prime walls before painting.
- Align Tape Carefully: Place the tape exactly where needed, pressing firmly along the edges to seal it tightly.
- Overlap When Necessary: For corners or long stretches, slightly overlap pieces of tape to ensure no gaps are left uncovered.
- Use a Putty Knife: Lightly run a putty knife over the tape edge to ensure full adhesion and prevent leaks.
Step 7: Prime The Walls (If Necessary)
Proper wall priming is a critical part of prepping wall for paint. It helps create a clean, even surface and ensures that paint adheres smoothly and lasts longer. Skipping this step can lead to blotchy finishes, uneven color, and peeling over time.
When to Use a Primer
Primer is not always needed, but there are specific cases where it becomes essential. As part of any wall preparation guide for painting, understanding when to prime can make a major difference in the final result.
- Over Repaired Areas: Repairs made with spackle or filler are porous and absorb paint differently. Priming seals these spots so that the paint looks even.
- Covering Stains: Stains from water damage, smoke, or mildew can bleed through paint. A stain-blocking primer prevents these blemishes from ruining the finish.
- Painting Over Dark Colors: When applying a lighter color over a dark wall, primer helps cover the old shade and reduces the number of paint coats needed.
- Painting New Drywall: New drywall is very absorbent. Primer creates a sealed surface that allows for even paint coverage.
- High Moisture Areas: Rooms like bathrooms and kitchens benefit from moisture-resistant primers to prevent paint from peeling.
Benefits of Priming for Even Paint Coverage
Acting as a thicker, protective base layer, primer shields surfaces from moisture, pollutants, and damage. With corrosion-inhibiting properties, it improves paint adhesion and helps create a longer-lasting, more durable finish.
- Creates an Even Surface: Primer smooths out variations in texture, helping the paint go on uniformly.
- Improves Paint Adhesion: Paint sticks better to primed surfaces, which helps extend the life of the paint job.
- Reduces the Number of Paint Coats Needed: By providing a neutral base, primer often eliminates the need for extra paint coats, saving time and money.
- Enhances Final Color Accuracy: Primer ensures that the paint color appears true to the sample without interference from previous colors or surface imperfections.
- Protects the Wall Surface: Primers add a layer of protection to drywall, plaster, and wood, keeping walls in better condition over time.
Frequently Asked Questions
What should I do about mildew or mold on the walls?
Mildew or mold presence on walls is something that typically needs attention before painting. These conditions can impact both the appearance and integrity of a new paint job. Preparing a wall affected by mold usually focuses on creating a clean, dry surface. Environmental factors often play a role in how mildew and mold develop.
What types of surfaces might need extra preparation?
Different surfaces such as drywall, plaster, wood, and masonry can require varied attention before painting. The materials may have distinct absorption rates, textures, or existing coatings that affect preparation needs. Environmental exposure and previous treatments are additional factors that can influence surface conditions. Some surfaces might present unique challenges depending on their history.
How does old paint affect wall preparation?
Existing layers of paint can influence how a wall must be prepared for new applications. Older paint may peel, crack, or discolor, impacting the readiness of the surface. The condition of the existing coat often guides decisions during the preparation stage. Surfaces with multiple paint layers might present different challenges than newly painted areas.
Does the age of a building affect wall preparation?
The age of a building can influence the condition of its walls and the amount of preparation needed. Older structures may have surfaces with accumulated wear, previous paint layers, or structural shifts. Materials used in construction might also differ based on the era, affecting how walls behave under new paint. Issues like plaster degradation or outdated coatings can be factors.
What challenges arise when prepping high walls or ceilings?
Prepping high walls and ceilings can introduce logistical and physical challenges. Accessing elevated surfaces may require specialized equipment or additional safety measures. These areas can also accumulate dust, cobwebs, or moisture-related damage over time. Height can make the identification and correction of imperfections more difficult.
Trust Experts To Perfect Every Wall Preparation!
Getting walls ready for a flawless finish is simple with help from Glastonbury Professionals House Painters. Every step, from repairs to priming, is handled with expert care and the best tools available. Homes across Glastonbury, CT, trust our team with the best tools for wall preparation to deliver smooth, lasting results that stand out.
Reach out to Glastonbury Professionals House Painters today to set up a free consultation!